<img height="1" width="1" style="display:none" src="https://www.facebook.com/tr?id=164616314193079&amp;ev=PageView&amp;noscript=1">

How to configure Single-Sign-On (SSO) with Preppio

Updated: 25/03/2021

Overview

Single-Sign-On (SSO) gives users access to Preppio application through an Identity Provider (IdP) that you control. This offers some benefits for you and your team:

✔️It's more secure: Provides an additional security and governance layer (no credentials are stored outside of your company’s controlled systems or transmitted over the network).
✔️It's easier for end users: Sign in to Preppio by using the same SSO credentials as other systems (e.g. laptop or internal applications), so your users can access Preppio without having to remember another password.

SAML 2.0

Preppio supports SAML (Security Assertion Markup Language) 2.0 for SSO. It's an industry standard, so this translates into our capability to integrate easily with any Identity Provider that supports SAML 2.0, even if not listed on this page, or to even create your own SSO implementation.

Follow your Identity Provider's instructions to configure SSO for Preppio. You should at a minimum have at least a SAML URL, SAML Issuer URL, and an X.509 certificate we will use in the next steps to set up the SSO. 

For the X.509 certificate, you may need to open up the downloaded certificate in a text editor in order to use it in the next steps.

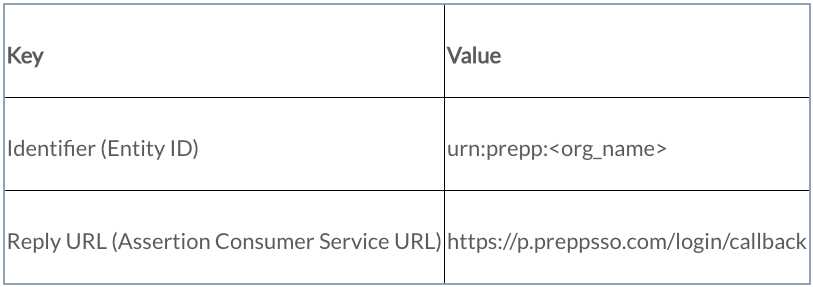
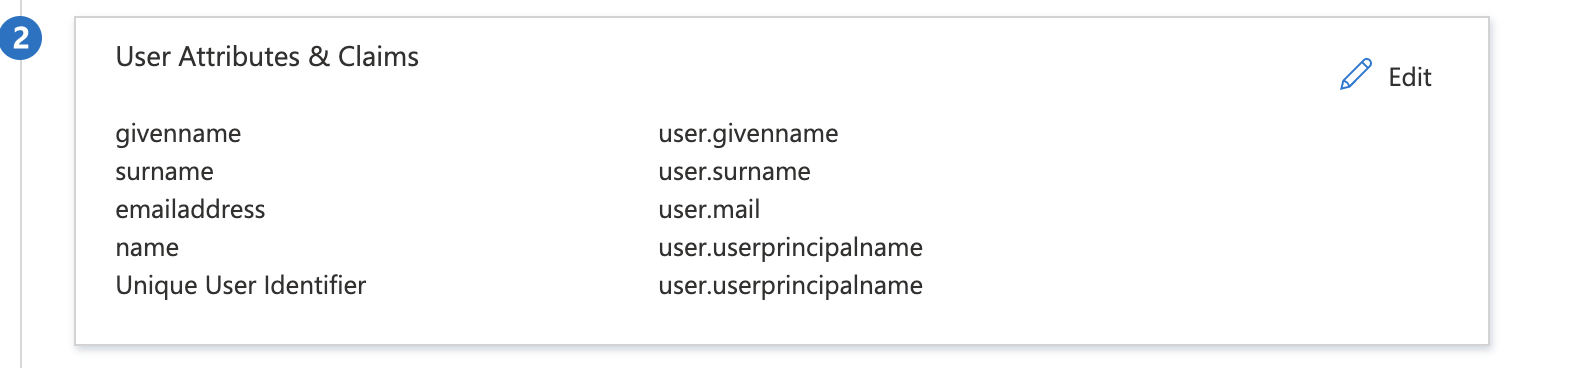
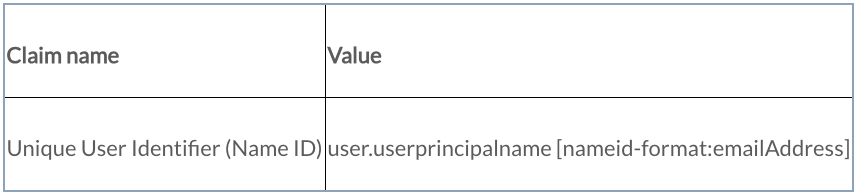
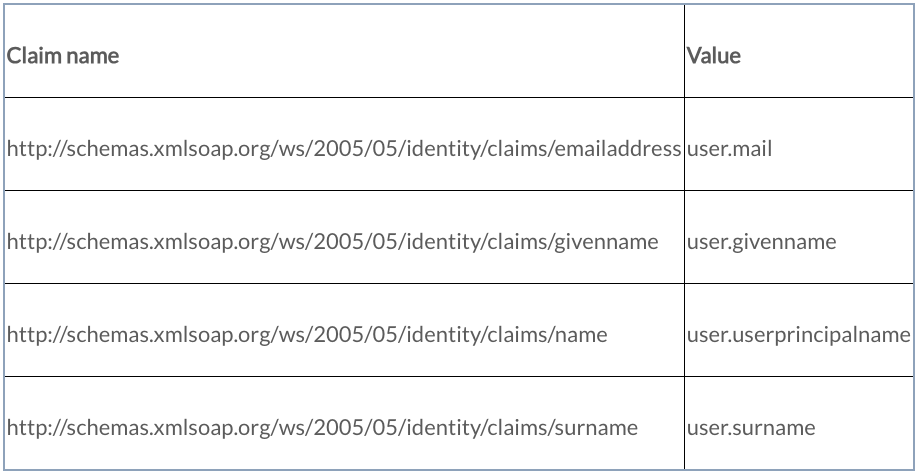
Basic configuration in your Identity Provider should include the following:

SSO


*<org_name> must be the name of your organization without spaces or special characters.

In the “User Attributes and Claims” set the following values 

SSO


Required claim

SSO


Additional claims

SSO

Create/download the certificate from your identity provider in base64 format and use it on the configuration settings page in Preppio app.

SSO


You should be all set up and run SSO for everyone in your organization. Please be aware that once the SSO is turned on it will not be possible to revert back.